Sourdough blueberry bread is the kind of loaf that makes people stop at the cutting board and stare for a moment. The crust crackles, the crumb is soft and open, and streaks of deep purple blueberry run through every slice. There is gentle sourdough tang, natural fruit sweetness, and just enough lemon to keep the whole loaf feeling bright instead of heavy.
This is not a cake style quick bread. It is real artisan sourdough, made with a living starter, slowly fermented, then loaded with juicy blueberries. It looks like something you would pay good money for in a bakery window, but the process fits easily into a home kitchen and an ordinary week.
If you came here searching for a clear method for sourdough blueberry bread, a way to use frozen berries, or a reliable overnight schedule that does not take over your whole day, you are in exactly the right place.

Sourdough Blueberry Bread Easy Step By Step Recipe
Equipment
- Kitchen scale
- Large mixing bowl
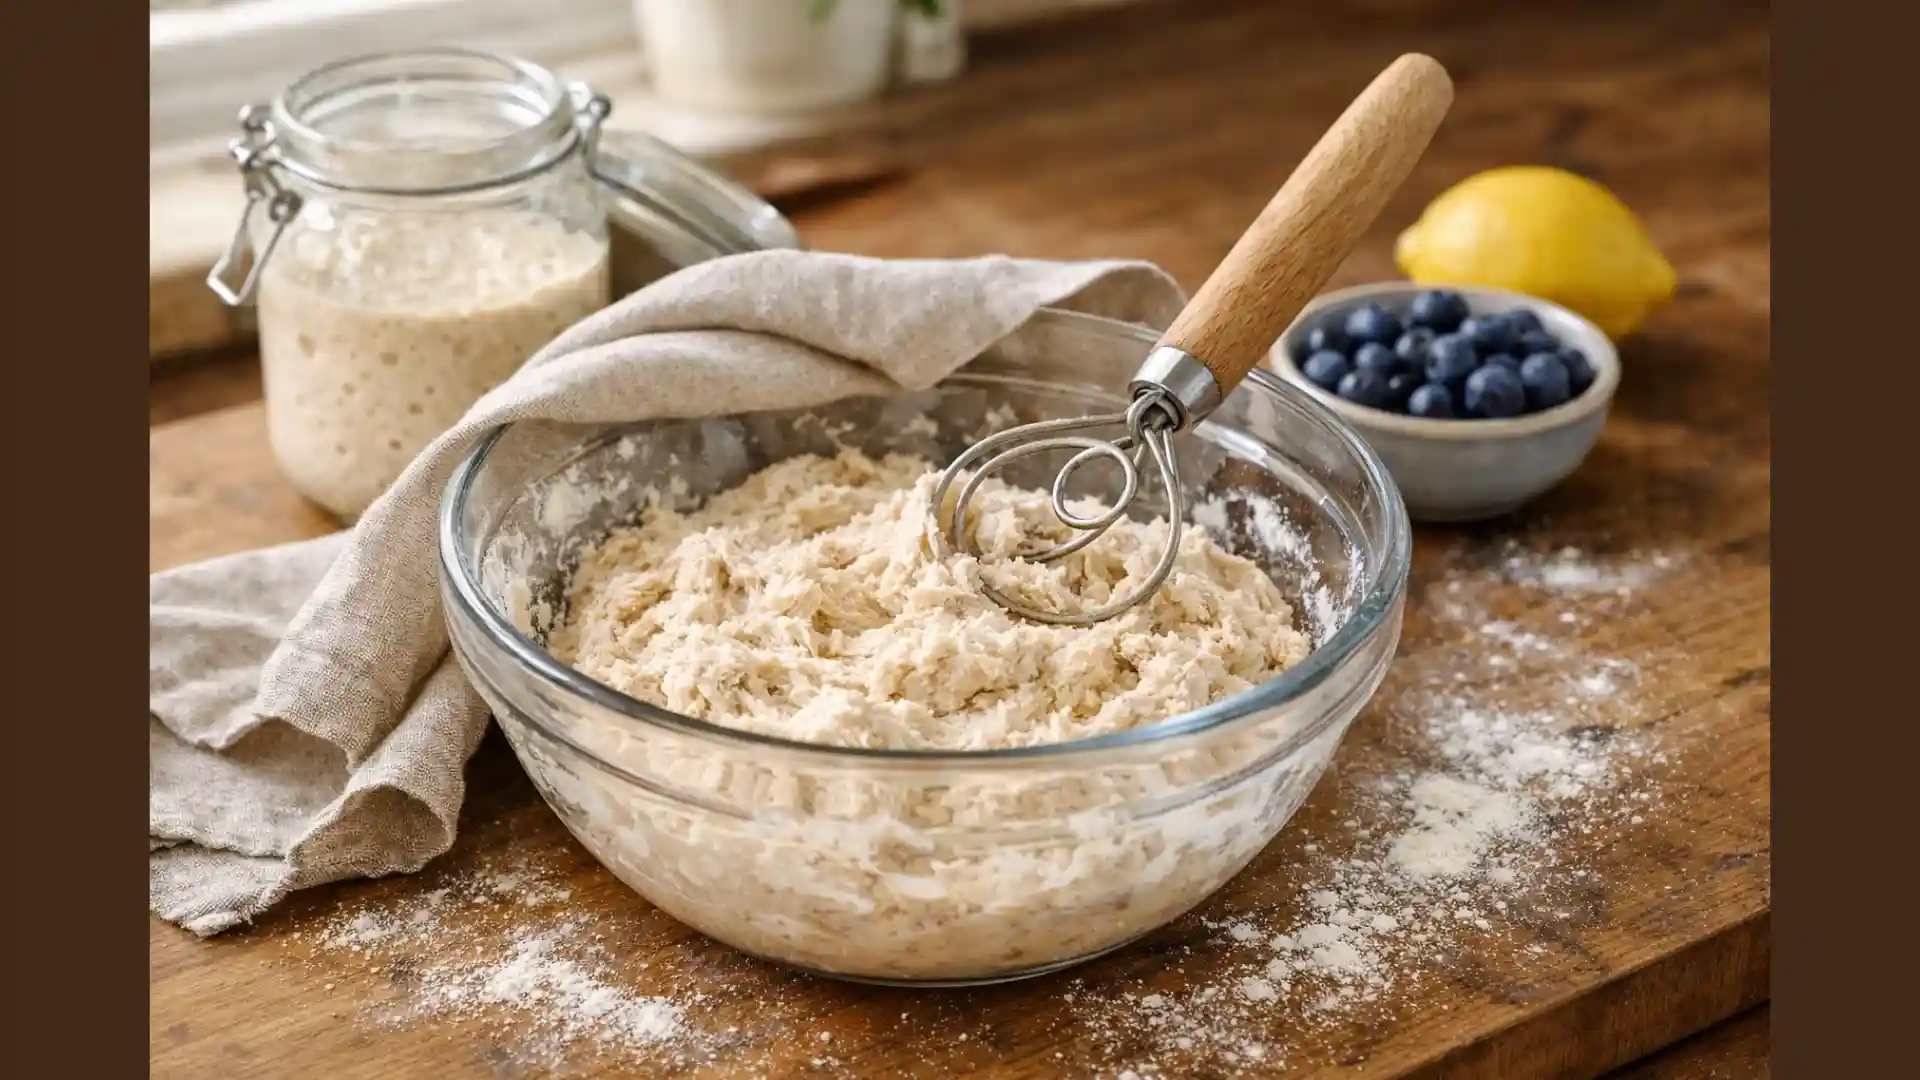
- Danish dough whisk or wooden spoon
- Flexible bowl scraper
- Bench scraper
- Banneton proofing basket or medium bowl with clean towel
- Parchment paper
- Sharp bread knife or lame for scoring
- Cast iron Dutch oven or heavy oven safe pot with lid
- Wire cooling rack
- Measuring spoons
Ingredients
Sourdough Blueberry Bread
- 50 g active sourdough starter, 100 percent hydration
- 350 g room temperature water
- 500 g bread flour
- 10 g fine sea salt, about 2 teaspoons
- 20 g granulated sugar, optional, for a slightly sweeter loaf
- 150 g blueberries, fresh or frozen
- Zest of 1 medium lemon, finely grated
- 15 g melted butter or neutral oil, optional, for a softer crumb
Whipped Blueberry Honey Butter Optional
- 113 g unsalted butter, softened
- 75 g blueberries, mashed
- 45 g honey
- Pinch of fine sea salt
Instructions
Make The Dough And Bulk Ferment
- Feed your sourdough starter 4 to 10 hours before mixing so it is bubbly, doubled in size, and smells pleasantly tangy when you start the dough.
- In a large mixing bowl, whisk the active sourdough starter into the room temperature water until it looks milky and mostly dissolved.
- Add the bread flour, salt, and optional sugar. Mix with your hand or a spoon until no dry flour remains and the dough looks shaggy and rough.
- Cover the bowl and let the dough rest for about 30 minutes to allow the flour to fully hydrate.
- With slightly wet hands, perform a set of stretch and folds. Lift one side of the dough, stretch it up gently, and fold it toward the center. Rotate the bowl and repeat until you have folded from all sides.
- Cover and rest the dough for 30 to 40 minutes, then repeat the same set of stretch and folds. Do this 2 to 3 more times, with rests in between, until the dough feels smoother and more elastic.
- After the final round of folds, cover the bowl and let the dough bulk ferment at room temperature until it has risen by about 50 to 75 percent, shows bubbles along the sides, and jiggles softly when you move the bowl. This usually takes 4 to 6 hours at around 70 degrees Fahrenheit.
Shape With Blueberries And Cold Proof
- Lightly flour your work surface. Gently turn the risen dough out of the bowl, trying not to deflate it completely.
- Use your hands or a bench scraper to fold the edges of the dough toward the center and form a loose ball. Flip it smooth side up and tighten it slightly by dragging it toward you on the counter. Cover and let it rest for 20 to 30 minutes.
- While the dough rests, rinse the fresh blueberries if needed and dry them very well, or keep frozen blueberries in the freezer until needed. Finely grate the zest from 1 lemon and toss it with the berries.
- After the rest, dust the top of the dough lightly with flour and flip it over so the smooth side is on the work surface. Gently stretch it into a wide rectangle without tearing it.
- Scatter about half of the blueberry and lemon zest mixture evenly over the dough, leaving a small border at the edges.
- Fold one long side of the rectangle toward the center, then sprinkle most of the remaining berries over this folded section. Fold the other long side over the top, like folding a letter, and scatter any remaining berries on top.
- Starting from the short end closest to you, roll the dough up into a snug log, trapping the berries in thin layers throughout.
- Turn the log seam side down and gently tighten it into a round or oval loaf by cupping your hands around it and dragging it toward you on the counter a few times.
- Dust a banneton or a medium bowl lined with a clean towel generously with flour. Place the shaped dough in the basket seam side up, cover lightly, and refrigerate for at least 8 hours and up to 24 hours for a slow cold proof.
Bake The Sourdough Blueberry Bread
- Place a cast iron Dutch oven or other heavy lidded pot in your oven and preheat to 450 degrees Fahrenheit for at least 30 minutes so the pot is thoroughly hot.
- When you are ready to bake, cut a piece of parchment paper and lay it over the chilled dough in the banneton. Invert the basket so the dough releases onto the parchment, smooth side up.
- Use a very sharp knife or lame to score a long slash across the top of the loaf, about 1/4 inch deep, to give the bread a controlled place to expand in the oven.
- Carefully remove the hot Dutch oven from the oven, lift the dough by the parchment, and lower it into the pot. Cover with the lid and return the pot to the oven.
- Bake the loaf covered for 25 to 30 minutes, then remove the lid and continue baking for another 10 to 15 minutes, until the crust is deep golden brown and the berry spots look slightly caramelized.
- Lift the sourdough blueberry bread out of the pot using the parchment and transfer it to a wire rack. Let it cool completely for at least 1 hour, preferably 2 hours, before slicing so the crumb can set.
- If you are making the optional whipped blueberry honey butter, beat the softened butter with the mashed blueberries, honey, and a pinch of salt until light and fluffy, then serve it with warm slices of bread.
Notes
or the best sourdough blueberry bread, use a very active starter that has recently doubled in size and looks bubbly and airy. Bulk fermentation times are a guide only, so always watch the dough. It should look risen, light, and jiggly before you preshape.

Fresh blueberries give neat pockets of fruit, while frozen blueberries create more dramatic blue and purple streaks in the crumb. If using frozen berries, add them straight from the freezer during lamination and expect the dough to feel slightly cooler and proof a little more slowly.

Baker schedule idea for an overnight loaf
Feed your starter in the afternoon, mix and fold the dough in the evening, then bulk ferment until it has risen by about half. Shape with blueberries, place in the banneton, and refrigerate overnight. Bake directly from the fridge in the morning.

Baker schedule idea for a same day loaf
Feed the starter early in the morning, mix and fold the dough late morning, bulk ferment through midday, then shape and cold proof in the fridge for at least 4 to 6 hours. Bake in the evening.

Leftover sourdough blueberry bread makes excellent French toast and also freezes very well. Slice the cooled loaf, freeze the slices in a bag, and toast directly from frozen for an easy breakfast.Quick answer for busy bakers
Here is the short version for readers who want to know right away whether this recipe is worth the effort.
To make sourdough blueberry bread, you
- Mix a simple sourdough dough with bread flour, water, salt, and active starter.
- Build strength with a few relaxed rounds of stretch and folds.
- Let the dough rise until it looks airy and alive.
- Gently laminate fresh or frozen blueberries and lemon zest into the dough.
- Shape the loaf, rest it overnight in the refrigerator, then bake it in a very hot covered pot.
The result is a crusty round loaf with a soft crumb, a ribbon of berries through the middle, and a flavor that feels perfect for breakfast or brunch.
At a glance
• Skill level
Confident beginner to intermediate sourdough baker.
• Active work time
About one hour, spread across the day.
• Total fermentation and resting time
Around eight to fourteen hours depending on room temperature.
• Best occasions
Lazy weekends, holiday brunch, summer mornings when blueberries are in season, or any day you want to turn your kitchen into a small bakery.

Why sourdough blueberry bread feels so special
On paper, sourdough blueberry bread is just a list of ingredients. Flour. Water. Salt. Starter. Blueberries. Lemon zest. In real life though, there is a different kind of magic at work.
Sourdough has its own quiet personality. A healthy starter holds wild yeast and friendly bacteria that slowly change the dough over hours. They lift it, they flavor it, they even help it keep better. When you fold ripe blueberries into that living dough, the fruit does not just sit there. It bleeds a little color into the crumb, softens into jammy pockets, and brings bursts of sweetness to each bite.
The loaf sits in a sweet spot between bread and treat. It is not sugary enough to feel like cake, and it is not plain enough to be just everyday toast. That makes it incredibly flexible. One person might slice it thick and eat it warm with salted butter. Another might toast it and stack it with yogurt and extra berries. Someone else will save the last few slices for French toast, when the crumb has firmed up a little.
From a search point of view, this bread also answers a mix of needs. People who look for
• sourdough blueberry bread recipe
• easy sourdough with fruit
• overnight blueberry sourdough
• how to add fruit to sourdough
are all circling the same idea. They want the depth of sourdough and the joy of fruit in a way that is not fussy or fragile. The method that follows is built exactly for that.
Ingredient map for sourdough blueberry bread
Think of this section as the ingredient knowledge graph for the loaf. Each item has a role, and every substitution has a trade off.
Core dough ingredients
For one medium round loaf you will need
• Bread flour
About five hundred grams, which is close to four leveled cups.
• Water at room temperature
About three hundred fifty grams, a bit more than one and one half cups.
• Active sourdough starter at equal parts flour and water
About fifty grams, roughly a generous quarter cup.
• Fine sea salt
Ten to eleven grams, close to two level teaspoons.
• Optional granulated sugar
Twenty to thirty grams, about two tablespoons, for a gently sweet crumb and deeper color.
Blueberry and flavor additions
• Blueberries
About one hundred fifty grams, near one packed cup. Fresh berries give slightly neater pockets, frozen berries give a more marbled look.
• Lemon zest
The finely grated outer peel from one medium lemon.
Why these ingredients matter
Bread flour
High protein bread flour makes a dough that can hold lots of fruit without slumping. It gives the loaf a steadier rise and a pleasantly chewy crumb.
Water
The amount of water here creates a dough that is soft enough to give an open crumb but not so loose that it collapses under the weight of blueberries. Remember that the berries carry their own juice, so the dough does not need to start extremely wet.
Active sourdough starter
This is the engine of the bread. It brings wild yeast for rising and lactic acid bacteria for flavor. When the starter is lively and well fed, you get dependable fermentation and a balanced, complex taste.
Salt
Salt keeps fermentation in check and makes the final bread taste like real food instead of bland dough. If you accidentally leave it out, the loaf will rise too fast and taste flat.
Sugar
Sugar is optional but useful. It softens the tang a little, encourages browning, and makes the crumb feel slightly more tender.
Blueberries
The star of the show. They add sweetness, color, and moisture, along with antioxidants and a familiar comfort flavor that many people love.
Lemon zest
The zest cuts through the softness of the crumb and the richness of the berries. It turns a pleasant fruit bread into something bright and memorable.
Thoughtful substitutions
Whole grain flour
You can swap up to one fifth of the bread flour for whole wheat or finely milled spelt. This adds fiber and a nutty note. If you push past that, the loaf will become denser and will not spring quite as high, so build up slowly.
Frozen berries
Frozen blueberries work. Keep them frozen until the moment you add them. They will cool the dough a little, which can be helpful in a warm kitchen. Expect a few more purple streaks through the crumb.
No added sugar
If you prefer a bread that leans fully into sourdough rather than sweetness, you can leave out the sugar. The berries will still offer their own sweetness.
Dairy and egg notes
The dough itself has no eggs and no dairy, so it already fits many vegetarian and dairy free diets. You can choose plant based spreads or nut butters for serving instead of butter if you wish.
Gluten free considerations
True gluten free sourdough uses a different starter and flour mix. If you already have a gluten free starter and a bread friendly gluten free flour blend, you can adapt the method here, but the texture and handling will be quite different. For most bakers, this recipe is best with wheat based bread flour.

Tools and timing so the loaf fits your life
You do not need a professional mixer or an artisan bakery oven. A few simple tools will make life easier and results more consistent.
Helpful tools
• A digital kitchen scale for accurate measurements
• One large mixing bowl
• A flexible bowl scraper and a bench scraper
• A clean tea towel or cloth
• A banneton basket, or any medium bowl lined with a well floured cloth
• Parchment paper
• A very sharp knife or bread scoring blade
• A heavy pot with a lid, such as a cast iron Dutch style pot
• A wire rack for cooling
Rough timeline at normal room temperature
Room temperature around seventy degrees Fahrenheit
Feed starter
Four to ten hours before mixing.
Mix and early folds
About two hours total including resting breaks.
Bulk fermentation
Four to six hours, depending on room warmth and starter strength.
Cold proof in the refrigerator
Eight to twenty four hours.
Bake and cool
Around two to three hours, including cooling time before slicing.
You can bend this schedule to your life. The method later includes two sample baker schedules, one overnight and one same day, so you can choose the rhythm that feels natural for you.
Step by step method for sourdough blueberry bread
This is the part most home bakers lean on. Each stage builds quietly on the last. Take your time and let your senses guide you as much as the clock.
Step 1
Feed and wake your starter
Choose the time you want to mix your dough. Count back four to ten hours, depending on how fast your starter usually rises in your kitchen.
Feed the starter with fresh flour and water, enough to give you at least fifty grams for the dough plus a little extra to keep for next time. A simple pattern is one part starter, four parts flour, and four parts water by weight. Stir well, cover loosely, and leave it at room temperature.
The starter is ready when it has doubled or a bit more, feels airy and spongy, and smells pleasantly tangy, like yogurt or mild vinegar rather than harsh. If in doubt, give it more time. A happy starter is the most important insurance you have against dense bread.
Step 2
Mix the basic dough
Pour the measured water into your mixing bowl. Add the ripe starter and stir until the mixture looks cloudy and smooth.
Tip in the bread flour, the salt, and the optional sugar. Use a spoon or your hand to work everything together until no dry flour remains. The dough will look rough and shaggy. That is fine.
Cover the bowl with a cloth and let it rest for about thirty minutes. During this quiet time, the flour soaks up water and the first gluten strands begin to form. You do not have to do anything. The dough changes all on its own.
Step 3
Strengthen the dough with gentle folds
After the rest, wet your hands lightly so the dough sticks less.
Slide your fingers under one side of the dough, lift that section up, and fold it back toward the center. Turn the bowl a quarter turn and repeat the fold. Keep going around the bowl until you have folded from every side. You will feel the dough beginning to tighten and pull back.
Cover the bowl again and leave it for thirty to forty minutes. Repeat the same stretch and fold round at least two more times, with similar rests in between. By the last round, the dough should feel smoother, more elastic, and less ragged. When you lift it, it should stretch before it tears.
These folds replace heavy kneading. They build strength slowly but surely, the way a patient walk builds fitness better than a rushed sprint.
Step 4
Let the dough rise during bulk fermentation
After the final round of folds, cover the bowl one more time and let the dough rest at room temperature.
Here, you rely more on signs than numbers. At a mild room temperature, you will usually see what you need in four to six hours after mixing, but do not lock yourself to that.
You are looking for
• A clear increase in volume, roughly half to three quarters more than the starting size.
• A gently domed surface instead of a flat, dense mass.
• Bubbles along the sides of the bowl or on top of the dough.
• A soft wobble when you nudge the bowl.
Press the surface very lightly with a fingertip. If the dough slowly springs back but still shows a whisper of a dent, it is usually ready for the next stage. If it snaps back fast, it may need a little more time. If it collapses and feels fragile, it may have gone too far. Over time, you will develop a quiet instinct for this moment.
Step 5
Preshape the dough for calm handling
Dust your work surface very lightly with flour. Ease the dough out of the bowl with a scraper, trying not to tear the structure.
With your hands or the scraper, fold the edges in toward the center until you have a loose ball. Flip it so the smooth side faces up. Use small dragging motions toward yourself, rotating the ball as you go, to create slight tension on the outer surface.
Cover this round with an inverted bowl or a cloth and leave it to relax for twenty to thirty minutes. This brief rest makes the dough easier to stretch later and helps it accept the blueberries without losing shape.
Step 6
Prepare blueberries and lemon zest
While the dough rests, get the flavor pieces ready.
If you use fresh berries, rinse them gently and spread them on a towel. Pat them dry thoroughly. Any extra water will make the dough stickier than it needs to be.
If you use frozen berries, keep them in the freezer for now.
Wash the lemon well. Grate the outer yellow peel finely, stopping before you reach the white pith. Mix the zest and the berries together in a bowl. You will smell that sharp citrus scent begin to bloom. That perfume will later drift out of your oven.
Step 7
Lamination and adding blueberries
This part feels a bit like working with soft fabric filled with jewels.
Lightly flour the top of the resting dough. Flip it over so the smooth side lies on the work surface. Gently coax it into a wide rectangle. You do not need a perfect shape. Just avoid stretching any area so thin that it almost tears.
Scatter about half of the blueberries and zest across the surface, leaving a thin margin at the edges.
Fold one long side of the dough toward the center, then sprinkle most of the remaining berries onto this new layer. Fold the other long side over, like folding a letter, and tuck the last berries on top.
Starting from the short end nearest you, roll the layered dough into a snug log. Try to keep the roll even, but do not worry if a berry pops here and there. A few stains and bumps give the loaf character.
Step 8
Final shaping for the basket
Turn the log so the seam side is down. Use your hands to cup and drag the dough toward you across the surface, then rotate it slightly and repeat. Each gentle drag builds more tension on the outside.
Your goal is a plump, smooth round or oval with a firm outer skin and a relaxed interior. If you see the surface start to tear or too many berries poking out, stop tightening. The dough has had enough.
Step 9
Into the proofing basket and into the cold
Dust your banneton or lined bowl generously with flour. Rice flour works particularly well because it does not absorb as much moisture, but ordinary flour is fine if that is what you have.
Lift the shaped dough carefully and place it in the basket seam side up. The pretty, smooth side is now resting in the flour and will later become the top of your loaf.
Cover the basket lightly with a cloth, a reusable cover, or a loose plastic bag to keep the surface from drying out. Transfer it to the refrigerator.
Let the loaf rest there for at least eight hours and up to twenty four. In this cool environment, the dough continues to ferment slowly. Flavors deepen. The structure settles. The schedule becomes flexible enough that you can bake when you are ready rather than racing to keep up.
Step 10
Heat the oven and score the loaf
When you feel ready to bake, place your heavy pot with its lid into the oven. Preheat to four hundred fifty degrees Fahrenheit. Give the pot at least thirty minutes to become properly hot.
Once both dough and pot are ready
Cut a piece of parchment large enough to hold the loaf. Take the basket from the refrigerator. Lay the parchment over the top of the dough, then flip the whole thing so the dough turns out onto the parchment.
Lift away the basket or cloth. You should see a pale, slightly domed loaf dusted with flour. If the surface looks very slack and spread out, the dough may be over proofed, but still worth baking.
With a very sharp knife or scoring blade, make one bold slash across the loaf. Aim for a cut about one quarter of an inch deep. This will guide how the bread opens as it rises in the oven and helps you avoid random blowouts.
Step 11
Bake sourdough blueberry bread
Use oven gloves to take the hot pot out of the oven and lift off the lid.
Holding the edges of the parchment, lower the dough into the pot. Place the lid back on and return the pot to the oven.
Bake with the lid on for around twenty five to thirty minutes. During this stage, steam from the dough is trapped inside, which keeps the crust soft enough to expand fully. This is when you see dramatic oven spring, that proud lift that makes sourdough look like sourdough.
After that, remove the lid and continue baking for another ten to fifteen minutes, until the crust is a deep golden brown and the berry spots at the surface look a little caramelized. If you tap the bottom of the loaf once it is out of the pot, it should sound hollow. An instant read thermometer pushed into the center should read at least two hundred five degrees Fahrenheit.
Step 12
Let the loaf cool and reveal the crumb
This is the hardest part for many people.
Lift the bread out of the pot with the parchment and place it on a wire rack. Leave it alone for at least one hour, and ideally closer to two.
As it cools, the crumb sets. Steam moves from the center outward. If you cut too soon, the inside can feel damp and sticky even when fully baked. If you wait, you are rewarded with neat slices, a tender crumb, and clear pockets of blueberry.
When the time finally feels right, use a sharp serrated knife to cut into the loaf. Listen to the soft crackle of the crust. Look at the way the purple from the berries feathers into the pale sourdough. Breathe in the mix of baked wheat, sweet fruit, and lemon.
Toast a slice. Let butter melt into the crumb. This is the moment all that waiting was for.
Two simple schedules for real life
The method above can fit different lifestyles. Here are two practical schedules many home bakers use.
Overnight sourdough blueberry bread
Great for weekdays or when you want fresh bread in the morning.
Morning or midday
Feed your starter so it peaks in the evening.
Evening
Around seven
Mix the dough, then move through the stretch and fold rounds over about ninety minutes.
Late evening
Once the dough has risen by about half and looks airy, preshape it, rest it, laminate in the blueberries, then shape it for the basket. Move the basket to the refrigerator for the night.
Next morning
Heat your oven and pot. Bake the loaf directly from the refrigerator. Cool, slice, and you have fresh sourdough blueberry bread for breakfast or brunch.
Same day sourdough blueberry bread
Perfect for a relaxed weekend.
Early morning
Feed your starter so it is ready by late morning.
Late morning
Mix the dough and perform the stretch and folds. Begin bulk fermentation.
Early afternoon
When the dough shows enough rise and lightness, preshape, rest, laminate in the blueberries, and shape.
Later afternoon
Place the loaf in the refrigerator for a shorter cold proof, perhaps four to six hours.
Evening
Bake the bread, let it cool, and enjoy it warm after dinner or save it for breakfast the next day.
Tips, variations, and small upgrades
There is the version you follow the first time, then the little changes you play with once you feel comfortable.
Practical tips
• Use bread flour with good protein content so the loaf holds its shape.
• Watch the dough more than the clock. Every kitchen is different.
• Keep the dough pleasantly cool. Hot kitchens and long ferments make fruit doughs fragile.
• When in doubt, shorten the bulk fermentation slightly and let the refrigerator do more of the work.
Flavor twists
Extra lemon
Add zest from a second lemon for a sharper citrus note. When the baked loaf is fully cool, you can also brush the crust lightly with a simple syrup made from sugar and lemon juice for a faint sheen and extra aroma.
Mixed berry loaf
Swap part of the blueberries for raspberries, blackberries, or sliced strawberries. Keep the total fruit amount the same to protect the structure.
Warm spice
For a cozy version, especially in colder weather, stir a teaspoon of cinnamon into the flour before you add water and starter. Cardamom is lovely as well, gentle but unmistakable.
Mildly enriched dough
If you prefer a slightly softer crumb, you can add a spoon or two of melted butter or neutral oil to the water before mixing the dough. The loaf will feel a little richer and stay tender a bit longer.
Adjustments for different food choices
Lower sugar life
Leave out the sugar if you prefer a bread that tilts toward savory. The blueberries still give sweetness, but the loaf feels closer to classic sourdough.
More fiber
Replace part of the bread flour with whole wheat and, if you like, sprinkle rolled oats over the top of the shaped loaf before baking. The oats toast in the oven and give a rustic look.
Dairy free serving
The bread itself is already dairy free, so you only need to pick a topping that fits your preferences. Nut butters, tahini with honey, and avocado all pair surprisingly well with sourdough blueberry bread.
How to serve and store sourdough blueberry bread
Serving ideas
Breakfast
Toast thick slices, then add butter, cream cheese, or Greek yogurt and more fresh berries. The warmth of the bread wakes up the blueberry and lemon aromas.
Snack
Serve a slice with a mug of tea or coffee in the afternoon. A small drizzle of honey or maple syrup turns it into a gentle treat without feeling heavy.
Dessert
Pair slightly warm slices with vanilla ice cream or whipped cream and extra berries. The sourdough tang keeps the dessert from becoming cloying.
French toast
Once the bread is a day or two old and a touch firmer, it becomes excellent French toast. The structure of the sourdough stands up well to soaking in egg custard.
Storage
Room temperature
Keep the cooled loaf at room temperature, cut side down on a board, or wrapped in a clean cloth, or inside a bread box. It will stay good for two to three days.
Freezer
For longer storage, slice the bread, place the slices in a freezer safe bag, press out excess air, and freeze. You can toast slices directly from frozen when you want them. This works especially well if you like a ready breakfast option.
Troubleshooting sourdough blueberry bread
Things do go wrong sometimes. That is how you learn. Here are the most common issues and how to steer around them.
The loaf looks flat and wide
Likely causes
• The dough did not develop enough strength.
• Bulk fermentation or proofing went on too long.
What to do
Next time, make sure you complete several good rounds of stretch and folds until the dough feels noticeably elastic. End bulk fermentation when the dough has grown by about half and feels airy but not loose. In the refrigerator, avoid stretches much beyond twenty four hours unless your fridge runs very cold.
The crumb feels gummy
Likely causes
• The bread was cut before it finished cooling.
• Bake time was a little too short.
What to do
Be strict about cooling time, especially with fruit rich loaves. If the crust is still quite pale when you remove the lid during baking, extend the uncovered bake by several minutes. If you use a thermometer, do not pull the bread until the center temperature reaches at least two hundred five degrees Fahrenheit.
The berries all sank near the bottom
Likely causes
• Berries were mixed in too early instead of during lamination.
• Dough lacked strength before shaping.
What to do
Keep the fruit out of the dough until lamination, after gluten has formed. Respect the stretch and fold stages. Do not increase the fruit amount beyond what the recipe suggests until you have seen how the loaf behaves.
The flavor is too sour or not sour enough
If the sourness is sharper than you like
Shorten the bulk fermentation and the cold proof. Use a starter that was fed more recently, when its aroma is mild and creamy.
If the sourness is too gentle and you want more tang
Allow the dough to ferment a bit longer during bulk, while still watching closely for signs that it is nearing full rise. Use the full range of the cold proof window. Some bakers even like to let the loaf go nearly a full day in the refrigerator for deeper flavor, though this demands a gentle hand.
dutch oven bread easy and delicious step by step recipe
Frequently asked questions about sourdough blueberry bread
Can I use frozen blueberries in sourdough blueberry bread
Yes, frozen blueberries are perfectly fine. The trick is to keep them frozen until you add them. Fold them in during lamination, not during early mixing. Expect the dough to cool a little and the final crumb to show more dramatic streaks of color. The taste will still be lush and bright.
What if I do not have a Dutch style covered pot
A heavy pot with a lid is convenient because it traps steam and makes results more repeatable. If you do not have one, you can still bake sourdough blueberry bread on a preheated baking stone or a thick metal tray.
Place a second empty tray on a lower oven shelf during preheating. When you put the loaf on the hot surface, pour a cup of hot water into the lower tray and close the door quickly. The burst of steam will help the loaf rise before the crust sets.
Can I leave out the lemon zest
You can. The bread will still be good, just a little softer in flavor. If you skip the lemon zest, you might enjoy adding a small splash of vanilla to the dough water, or simply allow the clean flavor of blueberry and sourdough to stand on its own.
How long does sourdough blueberry bread stay fresh
The loaf usually tastes best within the first two to three days at room temperature. After that, the crumb begins to dry and the berries lose some of their juiciness. Freezing slices on the first or second day is a smart way to extend the life of the bread without sacrificing quality.
How can I use this recipe with other sourdough or blueberry content on my site
If you run a food blog, this recipe can act as a hub for several internal connections. When you mention classic sourdough bread, beginner sourdough guide, or how to feed a sourdough starter, those phrases can point to your foundational sourdough posts. When you talk about summer blueberry recipes, you can link to blueberry muffins, blueberry pancakes, or blueberry compote. Readers get a smooth path through your content, and search engines see a clear cluster of related topics.