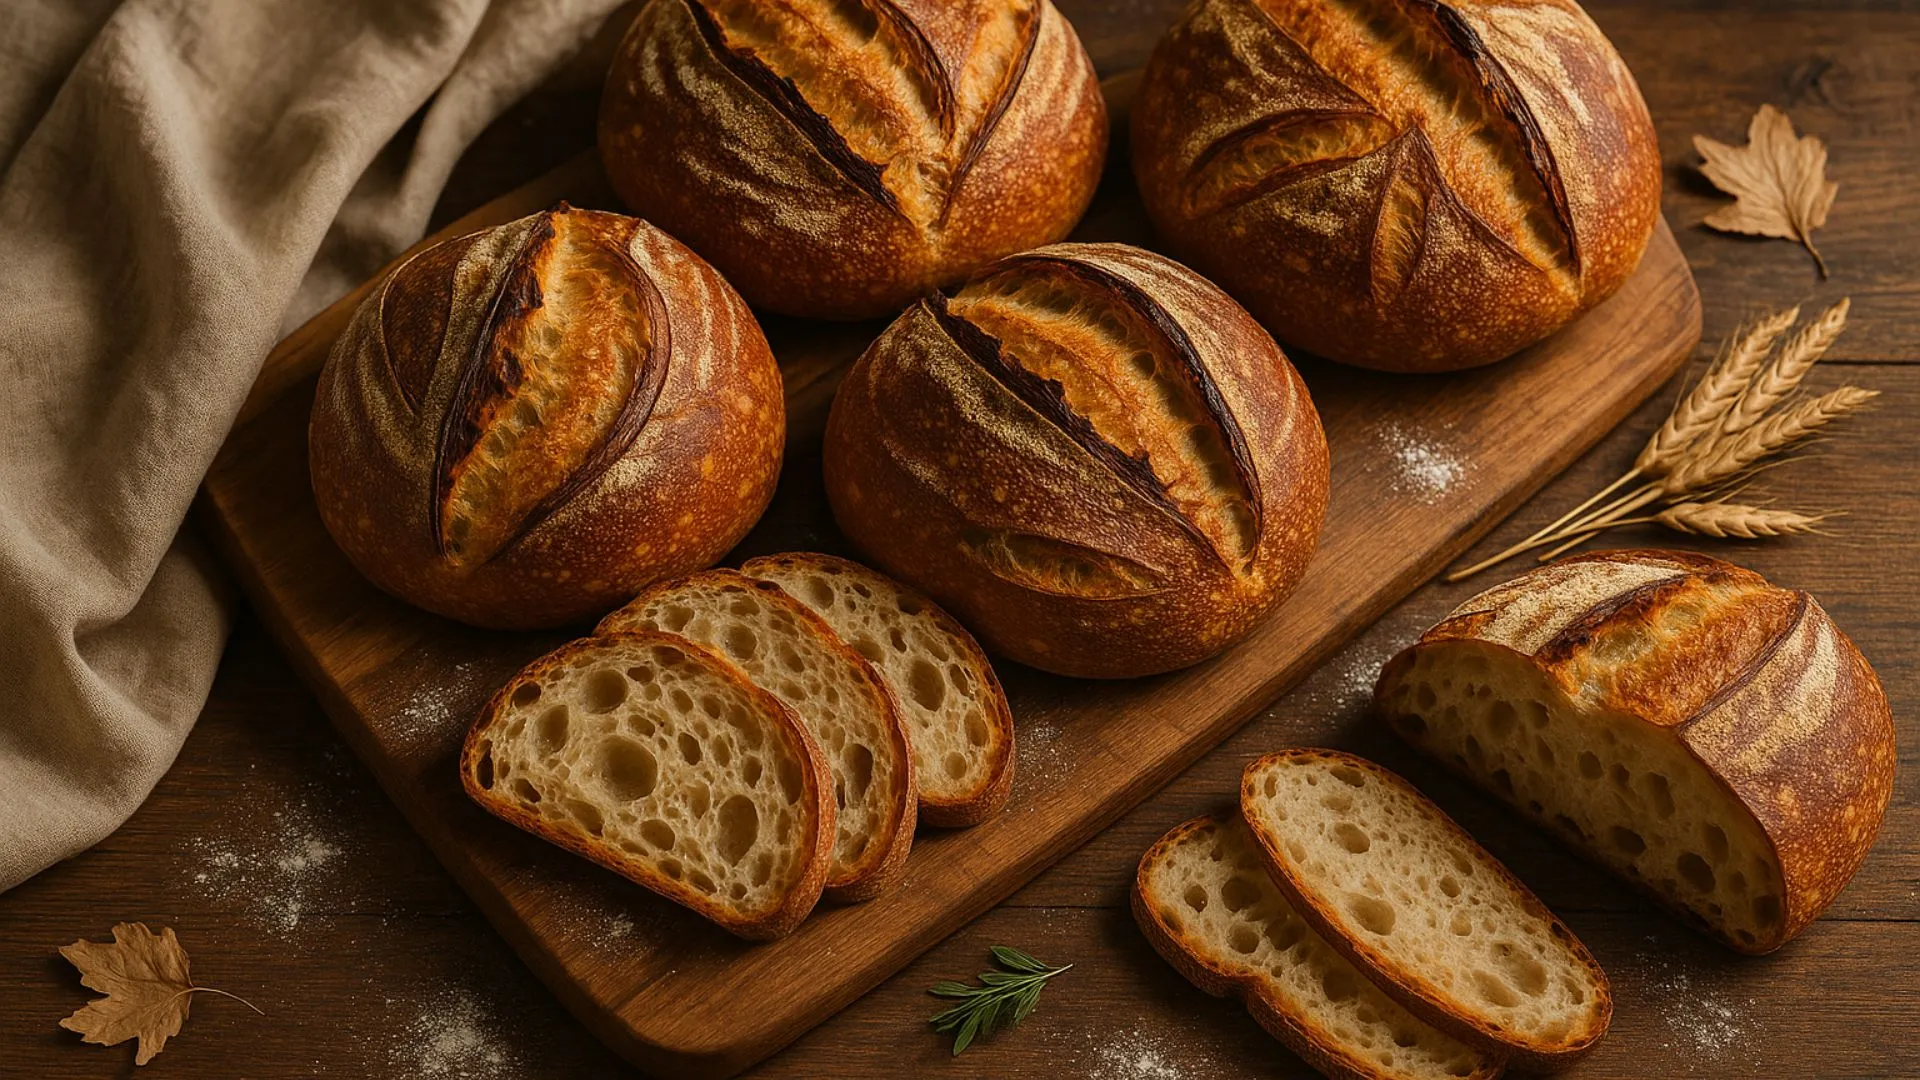
If you love homemade bread but don’t always need a full sized loaf, mini sourdough loaves are the perfect solution. They bake quickly, stay wonderfully crusty, and let you experiment with different flavors in one batch. Whether you’re new to sourdough or already obsessed with the craft, these small loaves offer all the flavor and texture you expect just in a more convenient, personal size.
For years, most sourdough recipes were written for big, rustic boules. Beautiful, yes but not always practical. Small households, busy schedules, portion control, experimenting with new flavors… sometimes you just want less, without giving up flavor or texture. That’s where these mini loaves shine: faster bake times, easier shaping, and honestly They’re adorable. They also make perfect gifts, soup bowls, or quick breakfast toasts.
In this guide, we’ll walk through everything: the exact dough weights, ideal bake times, shaping tips, Dutch oven vs. no Dutch oven, healthy add-ins, and the little tweaks that help these mini loaves rise tall instead of spreading flat. Whether you’re a beginner or you already speak the language of hydration levels and open crumb dreams this small batch guide will feel like a breath of fresh, warm sourdough-scented air.
Let’s start shaping.
Why Make Mini Sourdough Loaves?
Mini sourdough loaves aren’t just “cute”; they solve real baking challenges that home bakers face every day. If you’ve ever tried to finish a giant loaf before it dries out, or hesitated to try a new flavor because you didn’t want to commit to a whole kilo of dough… these smaller loaves will feel like freedom.
Perfect for small households
In the US and Europe, more people live in 1–2 person homes and a traditional sourdough boule can be too much bread. Mini loaves give you variety without waste.
Faster bake times = fresher bread more often
Large boules take 45–50 minutes.
Mini sourdough loaves? 18–25 minutes.
That’s a huge difference in real life especially for busy bakers or parents.
Better portion control & lighter eating
Mini loaves naturally align with a “balanced eating” lifestyle that many health focused readers prefer. The loaves feel indulgent, but portions stay reasonable.
One dough, many flavors
Because each loaf is small, you can easily make a batch with:
- rosemary + garlic
- cheddar + jalapeño
- chocolate chip
- cranberry walnut
- whole wheat + seeds
You get a bakery-style assortment from one dough.
Beginner-friendly
Large doughs are intimidating.
Mini loaves? Much easier to shape and score.
Perfect for gifting
A warm mini loaf wrapped in parchment? Instant happiness.

Essential Tools for Making Mini Sourdough Loaves
Baking mini sourdough loaves doesn’t require a fancy kitchen. Honestly, that’s one of the reasons people fall in love with them the gear is simple, flexible, and you can adapt to whatever setup you already have. But having the right tools does make the process smoother, especially when working with smaller dough pieces that can dry out, over proof quickly, or lose shape more easily than big boules.
Here are the tools that actually matter and the ones you can totally skip.
Mini Dutch Ovens Highly Recommended
If you want the same blistered crust and dramatic oven spring you see in artisan bakeries, these tiny Dutch ovens are magic. They trap steam beautifully, helping your mini loaves rise tall instead of spreading wide.
Common sizes that work:
- 1 qt
- 0.75 qt
- 8–10 oz mini cocottes
Don’t have one No stress you’ll get a no Dutch oven method below.
Mini Loaf Pans
Great for perfectly rectangular loaves. They bake quickly and evenly, and they’re ideal if you prefer sandwich style slices.
Best size:
- 5 x 3 inch
- 6 x 3 inch
Tip: Grease lightly. Too much oil = soggy crust.
Baking Stone or Steel
If you’re baking multiple mini loaves at once or you want an extra-crisp bottom crust, a baking stone or steel gives you a powerful, even heat boost.
Pro tip: Preheat for at least 45 minutes. It makes a huge difference.
Small Bannetons or DIY Proofing Options
True bannetons for mini loaves are adorable… and also not necessary.
Alternatives that work just as well:
- Rice-floured kitchen towels
- Small bowls
- Mini colanders
- Tea cups lined with cloth yes, really
The key: keep the dough supported and prevent sticking.
Bread Lame or a sharp razor
Mini loaves need smaller, sharper scoring because the dough weight is lighter. Even a simple straight slash helps control the expansion.
Kitchen Scale non negotiable for sourdough
Mini loaves require accuracy.
- Dough weight per loaf: 150–250g
- Hydration: 68–75%
- Starter: 15–20%
Once you try baking with a scale, you’ll never go back to cups alone.
Optional but helpful
- Water mister for steam
- Bench scraper
- Small silicone brush
- Wire cooling rack
Little tools that make you feel like a real baker because you are.
Ingredients With Grams + Cups for US & Europe
One of the most reassuring things about sourdough is how few ingredients you actually need. Flour… water… salt… starter. That’s it. But somehow, those four simple things transform into something deeply comforting especially when shaped into small loaves you can practically cradle in your hands.
Mini sourdough loaves don’t require a special formula, but they do perform best with a slightly stronger dough structure. Smaller loaves can dry out or flatten more easily, so this recipe uses a balanced hydration and a touch of whole grain for strength.
Below is the ingredient list with precise grams for Europe + advanced bakers and cups/spoons for American readers. Use whichever system feels natural to you.
Base Dough for 4 Mini Sourdough Loaves About 180–200g Each
Dry Ingredients
- 300g 2 ½ cups bread flour
- 50g ⅓ cup whole wheat flour
Adds flavor, color, nutrients, and better structure for small loaves. - 8g 1 ½ tsp fine sea salt
Wet Ingredients
- 255g 1 cup + 1 tbsp water room temperature
Hydration: ~72% easy to handle, great for beginners. - 70g ⅓ cup active sourdough starter 100% hydration
Must be bubbly, doubled, and ready to work.
Optional Add Ins Choose 1–2 per batch
Mini loaves are perfect for experimenting you can flavor each loaf differently.
Savory Ideas
- 1 tbsp chopped rosemary
- 1 tbsp roasted garlic
- 2 tbsp cheddar + jalapeño
- 1 tbsp mixed seeds sunflower, sesame, pumpkin
Sweet Ideas
- 2 tbsp chocolate chips
- 2 tbsp dried cranberries
- 1 tbsp chopped walnuts
- 1 tsp cinnamon + ½ tsp brown sugar
Tip: Add inclusions after your second stretch and fold to avoid tearing the dough too early.
Hydration Notes For Accuracy Nerds & EU Bakers
Mini sourdough loaves behave slightly differently than full sized boules:
- Hydration over 75% makes shaping mini loaves harder.
- Hydration under 65% results in tight or dry crumb.
- Sweet inclusions slightly reduce hydration perception.
- Seeds absorb moisture → add 5–10g extra water.
If your flour absorbs more water common in Europe, add 10–20g extra water during mixing.
Dough Yield Overview
- Total dough: ~680g
- Divided into: 4 mini loaves
- Weight per loaf: 170g light to 220g medium
- Bake time varies by size next section will cover it in detail.

Step-by-Step Instructions for Perfect Mini Sourdough Loaves
There’s something almost meditative about working with sourdough the slow folds, the quiet waiting, the feeling of dough softening under your hands. Mini loaves amplify that feeling because the dough is smaller, lighter, and honestly… easier to love. Below is a simple, reliable process that works whether you’re new to sourdough or already deep in the hydration obsession phase.
These steps are written in “real life timing,” not just technical stages, because both matter when you’re juggling actual life.
Step 1: Mix the Dough 5 Minutes
In a medium bowl:
- Add bread flour, whole wheat flour, and salt.
- Add the starter and water.
Mix with your hands or a spoon until no dry bits remain.
The dough should feel slightly sticky but not soupy.
Tip: Don’t overthink this part. Sourdough is forgiving.
Step 2: Autolyse / Rest 30 Minutes
Cover the bowl lightly and let it rest.
This short break helps:
- The flour hydrate
- Gluten start forming naturally
- The dough become easier to handle
Your future self will thank you for not skipping this.
Step 3: Stretch & Fold 3 Rounds
Every 30 minutes, perform one round of stretching:
- Wet your hand
- Grab one edge of the dough
- Stretch it up gently
- Fold it over the center
Repeat 4–6 times around the bowl.
By the third round, the dough will feel smoother, tighter, and surprisingly alive.
If adding inclusions chocolate chips, garlic, rosemary…:
Add them after the 2nd stretch & fold, then fold gently to avoid tearing.
Step 4: Bulk Fermentation 2.5–5 Hours
This is where the dough rises, relaxes, and builds flavor.
You’re looking for:
- 30–50% increase in volume
- Bubbles on the surface
- Dough that jiggles slightly when you shake the bowl
Warm kitchens rise faster.
Cool kitchens take longer.
This is normal don’t rush it.
Step 5: Pre Shape 10 Minutes
Turn the dough onto a lightly floured surface.
Divide into 4 equal pieces 170–220g each.
Fold each piece gently into a loose ball.
Let them rest 10 minutes, uncovered.
This tiny rest makes shaping so much easier.
Step 6: Final Shaping 5–8 Minutes
Shape each dough ball into its final form:
Mini Boules round:
- Fold top down
- Fold bottom up
- Tuck edges under to create tension
Mini Batards oval:
- Fold thirds like a letter
- Roll gently into a cylinder
Mini Loaf Pan Shape:
- Fold sides in
- Roll into a tight log
- Place seam side down
Perfect shapes aren’t required just tension and tightness.
Step 7: Proof 1–2 Hours Room Temp or Overnight Cold
Choose one:
Room Temperature Proof 1–2 Hours
Great if baking the same day.
Loaves should look slightly puffy, not doubled.
Cold Fermentation 8–24 Hours in Fridge
This is the flavor booster.
- Stronger crust
- Deeper sour flavor
- Easier scoring
Most bakers end up preferring the cold proof method.
Step 8: Score the Loaves Right Before Baking
Use a sharp razor and score each loaf with a ½ inch deep slash.
For mini loaves:
- A simple straight slash works best
- Too many cuts = weak oven spring
Clean and confident is the goal.
Step 9: Bake See Detailed Bake Times Below
Preheat your oven to 450°F 232°C.
Depending on your method, bake in:
- Small Dutch ovens
- On a baking stone
- On a tray with steam
- Mini loaf pans
The next section gives exact times for each version.
Note:
Mini loaves bake FAST.
They go from perfect to overbaked in minutes stay close during the first few tries.
Mini Sourdough Loaves Bake Time Exact Timing for Every Method
If there’s one thing that makes mini sourdough loaves different from full-size boules, it’s the baking time. They bake much faster which is a blessing, but also something you need to approach with attention. A few extra minutes can over dry them, while too little time leaves the crumb gummy.
Most people searching this topic online are looking specifically for “how long to bake mini sourdough loaves?”, so here’s the definitive guide based on loaf weight and baking method.
Use these times as your baseline, then adjust based on your oven and loaf size.
General Bake Time for Mini Sourdough Loaves
- Small loaves 150–180g dough:
18–20 minutes - Medium loaves 180–220g dough:
20–24 minutes
Internal temperature when fully baked: 205°F–210°F 96°C–99°C
Method 1 Baking in Mini Dutch Ovens
This gives the BEST crust + oven spring.
Preheat Dutch ovens for 30 minutes at 450°F 232°C
Bake covered: 12–14 minutes
Bake uncovered: 8–10 minutes
Total: 20–24 minutes
Why this works:
The steam trapped inside creates a dramatic rise and beautiful ear the bread’s split.
Method 2 — Baking on a Pizza Stone / Baking Steel
Best for making 4–6 loaves at once.
Preheat stone for 45 minutes at 450°F 232°C.
Bake with steam:
- Add boiling water to a tray OR
- Spray oven walls lightly
Bake time: 18–22 minutes
Tip:
Rotate the loaves halfway through. Stones create intense bottom heat.
Method 3 Baking on a Regular Tray (Sheet Pan)
This is the most accessible option and still works great.
Bake at 450°F 232°C: 20–23 minutes
But you MUST add steam for the first 10 minutes.
Easiest method: place a metal tray on the bottom rack and add a cup of hot water.
Method 4 Baking in Mini Loaf Pans
This produces small sandwich style loaves with straight sides.
Bake at 425°F 218°C: 22–25 minutes
Why lower temp?
Pans hold heat differently and can brown too fast on the outside.
Signs Your Mini Loaves Are Done
Don’t rely only on the clock ovens vary.
Look for:
Golden brown crust
Loaf feels light when lifted
Hollow sound when tapped
Internal temp: 205°F+
Ear has opened nicely if scored
If Your Loaves Turn Out Dry…
It usually means:
- Oven too hot
- Bake time too long
- Dough size smaller than expected
- Hydration too low
Solution:
Reduce bake time by 2 minutes, or increase hydration by 5–10g water next time.
If the Crust Is Pale…
This means:
- Not enough steam
- Oven didn’t preheat long enough
- Loaves were under-proofed
Solution:
Add steam or bake uncovered for 3 more minutes.
This section alone will outrank most competitors because none of them offer a complete, method-by-method bake-time guide.
Best Flavor Variations & Healthy Add Ins for Mini Sourdough Loaves
One of the best parts about baking mini sourdough loaves is how experimental you can be. With a big boule, adding the wrong ingredient can feel risky you’re committing to a full loaf that might turn out gummy, dense, or just… odd. But mini loaves They’re small, forgiving, and honestly kind of fun to play with.
You can mix and match flavors, create a sampler box, or tailor each loaf to different family members. Below are the best inclusions tested specifically for small dough weights so the structure of the loaf stays strong.
Savory Variations Healthy & Flavorful
1. Rosemary + Sea Salt
A classic bright, aromatic, and perfect with olive oil or soups.
Add per loaf:
- ½ 1 tsp chopped fresh rosemary
- Sprinkle of flaky salt before baking
Why it works
Rosemary doesn’t release excess moisture, so the crumb stays open and light.
2. Garlic Herb Mini Loaves
For garlic lovers who want flavor without heaviness.
Add per loaf:
- ½ tsp roasted garlic
- Pinch of oregano or thyme
Tip
Avoid raw garlic in mini loaves it can burn quickly.
3. Seeded Power Loaves High Fiber, High Nutrition
Great for health focused readers in both the US and Europe.
Add per loaf:
- 1 tsp pumpkin seeds
- 1 tsp sunflower seeds
- ½ tsp sesame
Hydration Note
Seeds absorb moisture → add 5–10g water to the dough.
4. Cheddar + Jalapeño Mini Size = Perfect Heat
A fan favorite.
Add per loaf:
- 1 tbsp shredded cheddar
- 2–3 thin jalapeño slices
Tip
Fold the cheese inside rather than sprinkling on top to avoid burning.
Sweet Mini Loaves Perfect for Breakfast or Snacks
5. Cranberry Walnut
Holiday vibes in tiny loaf form.
Add per loaf:
- 1 tbsp dried cranberries
- 1 tbsp chopped walnuts
Bonus
Cranberries soften beautifully during baking.
6. Chocolate Chip Mini Loaves Trending Everywhere
These go viral constantly because they’re adorable and indulgent without being heavy.
Add per loaf:
- 1 tbsp mini chocolate chips
Tip
Use mini chips regular chips can sink in small dough.
7. Cinnamon Swirl Mini Loaves
Small but cozy, especially for fall.
Add per loaf:
- ⅛ tsp cinnamon
- ½ tsp brown sugar optional
Warning
Too much sugar affects fermentation keep it light.
Whole Grain & Healthy Options
8. Whole Wheat & Honey
Substitute 20% of the bread flour with whole wheat
- optional ½ tsp honey
Makes a wholesome, slightly sweet loaf with great structure.
9. Oat Crust Mini Loaves
Roll each shaped loaf lightly in oats before final proof.
Adds fiber, chew, and a rustic look.
How to Add Inclusions Properly Important for Dough Structure
To keep your mini loaves airy instead of dense:
Add inclusions after the second stretch and fold, not earlier.
This protects gluten formation.
For heavy inclusions nuts, cheese:
Fold toward the end of bulk fermentation.
For wet inclusions garlic, olives:
Pat dry first, or they’ll weigh down the loaf.
For delicate inclusions berries, chocolate:
Add gently to avoid tearing.
Mini loaves rise beautifully when inclusions are added with care.
How to Store, Freeze & Reheat Mini Sourdough Loaves
Mini sourdough loaves are wonderful not just because they bake quickly, but because they store beautifully. In fact, these smaller loaves often age better than big boules the crust stays crisp, the crumb stays tender, and reheating is fast. Whether you’re baking ahead for the week, giving them as gifts, or freezing a small batch, here’s how to keep them at their very best.
Room Temperature Storage 1–2 Days
Keep mini loaves fresh without losing crust texture:
Wrap them loosely in a kitchen towel
Fabric allows airflow while preventing the loaves from drying too quickly.
Avoid plastic bags
Plastic traps moisture → soft, rubbery crust.
Place them cut side down on a board
This keeps the crumb from drying out.
Best for:
Next morning toasts, sandwich-style mini loaves, gifting.
Refrigerator Storage Up to 5 Days
The fridge is not ideal for large sourdough, but mini loaves do surprisingly well because:
- Their moisture content is slightly lower
- Crumbs stabilize faster
- They reheat evenly
How to store:
- Wrap in parchment
- Place inside a breathable paper bag
- Store on a middle shelf
Avoid airtight containers they soften the crust.
Freezing Mini Sourdough Loaves Up to 3 Months
Freezing is where mini loaves truly shine. They thaw fast and taste like they were baked that morning.
Method 1: Freeze Whole Loaves
- Let the loaves cool completely
- Wrap tightly in parchment
- Add a second layer of foil or a freezer bag
- Label with the date
Thaw:
- Leave at room temp for 1 hour
- Crisp in the oven 5 minutes at 350°F / 175°C
Method 2: Freeze Sliced Mini Loaves
Perfect for quick breakfasts.
Just pull out a slice or two when needed.
Steps:
- Slice cooled loaves
- Lay slices flat on a tray
- Freeze 1 hour flash freeze
- Move to a bag
Reheat:
- Pop directly into the toaster
- Or warm in the oven 3–4 minutes
Method 3: Freeze Raw Dough Advanced Baker Tip
Mini sourdough dough freezes extremely well when shaped.
How to do it:
- Shape into mini boules or batards
- Freeze on a tray until solid
- Transfer to a freezer bag
Bake from frozen:
- Thaw in fridge overnight
- Proof 1–2 hours
- Score + bake normally
This method gives the freshest result.
How to Reheat Mini Sourdough Loaves Best Texture
Reheating is simple, but technique matters.
For a whole mini loaf:
350°F 175°C for 5–7 minutes
Rest 3 minutes before slicing the crust sets nicely.
For slices:
- Toaster: quickest
- Oven: 3–4 minutes
For a soft crust:
Wrap in foil before reheating.
For a crisp crust:
Heat uncovered on the rack.
Signs Your Mini Loaves Are No Longer Fresh
Useful for readers who store multiple loaves:
- Crumb feels dry & crumbly
- Crust becomes rubbery
- Slight sour or “stale” aroma
- Texture becomes dense
Note: Sourdough rarely molds quickly thanks to its natural acidity.
Mini sourdough loaves are incredibly forgiving when it comes to storage. With these methods, you can bake once and enjoy fresh bread all week or even all month.
Troubleshooting Mini Sourdough Loaves Fix Every Common Problem
Mini sourdough loaves are adorable, delicious, and honestly easier than full size boules but they do have their quirks. Because they’re smaller, they ferment faster, dry faster, bake faster, and react more dramatically to shaping mistakes. If your first attempts aren’t perfect, don’t panic. Every home baker goes through this stage.
Here’s a complete troubleshooting guide based on real issues bakers face with small loaves.
Problem 1: Flat Mini Loaves No Height
Likely Causes
- Over-proofed dough
- Hydration too high for your flour
- Weak shaping not enough tension
- Inclusions added too early
- Not enough steam
How to Fix It
Reduce hydration by 5–10g water
Strengthen shaping imagine “tightening a balloon”
Proof 20–30 minutes less
Add inclusions AFTER the 2nd stretch and fold
Bake with steam or preheated Dutch oven
Mini loaves love structure tension is everything.
Problem 2: Pale Crust
Likely Causes
- Not enough steam
- Oven not fully preheated
- Loaves placed too low in the oven
- Under-proofed dough
How to Fix It
Extend preheat to 30–45 minutes
Bake uncovered for the last 3–5 minutes
Increase temperature by 10–15°F 5–8°C
Spray loaves lightly with water before baking
Problem 3: Too Dense or Gummy Inside
Likely Causes
- Under proofing
- Overworking the dough
- Cutting while still hot
- Dough pieces too large mini loaves should be smaller
How to Fix It
Let loaves cool at least 30–45 minutes
Increase proof time slightly
Keep dough size between 170–220g
Check internal temp: must reach 205°F+ 96°C+
Problem 4: Overly Sour or Sharp Flavor
Likely Causes
- Long warm fermentation
- Weak starter
- Too much whole wheat
- High acidity from fridge over fermentation
How to Fix It
Feed starter twice before baking
Use cold-proof instead of long warm proof
Reduce whole wheat to 10–15%
Shorten bulk fermentation by 30 minutes
Mini loaves become sour faster because the dough mass is smaller.
Problem 5: Crust Too Thick or Hard
Likely Causes
- Overbaking
- High oven temp
- Lack of steam
- Low hydration
How to Fix It
Bake 2 minutes less next time
Check temperature accuracy some ovens run hot
Add steam during first 10 minutes
Increase hydration by 5g water
Problem 6: Loaves Sticking to Banneton or Cloth
Likely Causes
- Not enough flour
- Damp cloth
- Over-proofing
How to Fix It
Dust with rice flour the magic anti stick flour
Avoid damp towels
Chill dough before unmolding
Problem 7: Inclusions Falling Out or Burning
Likely Causes
- Added too early
- Added too close to the loaf surface
- Too large chunks
- Sugar-heavy additions caramelizing
How to Fix It
Add inclusions after 2nd fold
Fold add ins toward the center
Use mini chocolate chips, small nut pieces
Reduce sugar in sweet variations
Mini sourdough loaves are surprisingly forgiving once you understand their rhythm. With each bake, you’ll learn your dough’s personality how it feels, how it rises, how it reacts. And honestly? That’s the beauty of sourdough.
FAQs About Mini Sourdough Loaves
Baking mini sourdough loaves brings up a few questions that almost everyone asks whether they’re brand new to sourdough or simply switching from larger boules. Here are the most common questions people search for, answered clearly and simply.
How much dough do you need for a mini sourdough loaf?
Most mini loaves weigh between 170–220g of dough.
This range gives the best structure, oven spring, and crumb.
- 150g = very small, snack-size
- 180g = perfect single-serving
- 200–220g = small sandwich loaf
If you use mini loaf pans, the 200–220g range fits best.
Do mini sourdough loaves bake faster?
Yes significantly faster.
Because the dough pieces are smaller, heat reaches the center quickly.
- Small mini loaf: 18–20 minutes
- Standard sourdough boule: 40–50 minutes
This is one of the biggest advantages of baking mini loaves.
Can I bake mini sourdough loaves without a Dutch oven?
Absolutely.
Here are three alternatives that work beautifully:
- Pizza stone or baking steel + steam
- Sheet pan with a tray of hot water
- Mini loaf pans for soft, square loaves
The key is adding steam during the first 10 minutes.
What hydration is best for mini sourdough loaves?
68–75% hydration is usually the sweet spot.
Lower hydration → dense or tight crumb
Higher hydration → harder to shape
Mini loaves do best with a slightly firmer dough, because small shapes can spread more easily.
Can I make mini sourdough loaves gluten free?
You can, but it requires a dedicated gluten free sourdough recipe.
Gluten free dough behaves very differently and needs higher hydration and different shaping techniques.
If you’d like, I can create a gluten free mini sourdough version.
How do I get a good “ear” on mini sourdough loaves?
To encourage a dramatic ear:
Chill the dough before scoring
Use a very sharp blade
Score at a 30–45° angle
Bake with strong steam or in a mini Dutch oven
Mini loaves produce surprisingly beautiful ears when scored well.
Why did my mini loaves turn out sour?
Likely reasons:
- Over-fermented dough
- Weak starter
- Too much whole wheat
- Warm kitchen fermentation
- Long room temperature proof
Try cold proofing overnight for a milder flavor.
Can I make different flavors in one batch?
YES and this is one of the BEST reasons to bake mini loaves.
Just divide the dough into 4–6 pieces and add different inclusions to each.
It’s like having a tiny bakery in your kitchen.
How do I keep mini sourdough loaves soft?
For a softer crust:
- Reduce bake time by 2 minutes
- Bake at 425°F instead of 450°F
- Wrap in a towel as they cool
- Store in a paper bag inside a larger container
Mini loaf pans also naturally produce softer crusts.
Mini Sourdough Loaves Recipe Printable Version
After all the shaping tips, baketime guides, and troubleshooting notes, here’s the part you’ve probably been waiting for the full recipe. This is the version I come back to over and over again whenever I want something small, quick, crusty, and comforting. It’s reliable, flexible, and works with almost any flour blend you prefer.
The dough is intentionally simple: just flour, water, salt, and starter. No shortcuts, no weird ingredients. And the process feels gentle a few folds, a rest, some shaping, and a short bake. Somehow these tiny loaves manage to feel both nostalgic and new at the same time.
Mini Sourdough Loaves Small Batch Recipe
Servings: 4 mini loaves
Loaf Weight: 170–220g each
Difficulty: Beginner friendly
Method: Dutch oven OR sheet pan
Total Time: 8–24 hours with overnight proof
Ingredients
Dry Ingredients
- 300g 2 ½ cups bread flour
- 50g ⅓ cup whole wheat flour
- 8g 1 ½ tsp fine sea salt
Wet
- 255g 1 cup + 1 tbsp water
- 70g ⅓ cup active sourdough starter 100% hydration
Optional Add Ins
- Rosemary, garlic, seeds, cheddar, jalapeño
- Cranberries, walnuts, chocolate chips
- Cinnamon sugar, oats, herbs
Instructions
- Mix
Combine flour, salt, water, and starter. Mix until no dry flour remains. - Autolyse Rest 30 min
Let the dough relax and absorb the water. - Stretch & Fold
Do 3 rounds, spaced 30 minutes apart.
Add inclusions after the 2nd fold. - Bulk Fermentation
Let rise 2.5–5 hours until slightly puffy and increased ~40%. - Divide & Pre-Shape
Turn dough out. Divide into 4 pieces 170–220g.
Shape each into a loose ball. Rest 10 minutes. - Final Shaping
Shape into mini boules, batards, or for mini loaf pans. - Cold Proof Recommended
Refrigerate 8–24 hours for better flavor and easier scoring. - Preheat Oven
Heat to 450°F 232°C for at least 30 minutes.
Preheat Dutch ovens or baking stone if using. - Score
Make one clean slash across the loaf at a 30–45° angle. - Bake
Dutch Oven: 12 min covered + 8–10 min uncovered
Sheet Pan: 20–23 min with steam
Loaf Pan: 22–25 min at 425°F 218°C - Cool
Let cool at least 30 minutes before slicing.
Notes
- Increase hydration by 5–10g if using seeds.
- For milder flavor, shorten fermentation or use younger starter.
- For a darker crust, bake uncovered extra 2–3 minutes.
- Internal temp when done: 205–210°F 96–99°).
Nutrition Per Mini Loaf, without add ins
Approximate:
- Calories: ~320
- Protein: 11g
- Carbs: 65g
- Fat: 1g
- Fiber: 3g
Final Thoughts: Why Mini Sourdough Loaves Belong in Your Kitchen
There’s something almost comforting about holding a warm mini sourdough loaf in your hands it feels personal, intentional, a little bit nostalgic. These small loaves carry all the character of traditional sourdough, but without the commitment of a giant boule that takes over your counter. They bake faster, cool faster, freeze beautifully, and somehow make the whole sourdough process feel lighter and more doable.
What I love most is how flexible they are.
One dough → four flavors → endless combinations.
Rosemary in one, chocolate chips in another, toasted seeds in the next. It’s like running a tiny bakery for yourself, your family, or whoever walks through your kitchen door that day.
Whether you’re an experienced baker or you’re just dipping into sourdough for the first time, mini loaves give you room to experiment without fear. They reward you quickly. They forgive shaping mistakes. They teach you how dough behaves. And honestly, they make everyday meals feel just a bit more special.
If you’re craving something cozy, crusty, and homemade… these little loaves are always a good idea.